All Categories
Featured
Table of Contents
- – Replace Rv Roof La Habra, CA
- – OCRV Center
- – Roof Repair For Rv La Habra, CA
- – Rv Rubber Roof Maintenance La Habra, CA
- – Rv Rubber Roof Maintenance La Habra, CA
- – Rv Roof Repair Fiberglass La Habra, CA
- – Resealing Rv Roof La Habra, CA
- – Rv Roof Repair Service Near Me La Habra, CA
- – Rv Rubber Roof Replacement Cost La Habra, CA
- – Repair Rv Roof Leak La Habra, CA
- – Rv Roof Repair La Habra, CA
- – Motorhome Roof Replacement La Habra, CA
- – Repair Rv Roof La Habra, CA
- – Rubber Roof For Camper La Habra, CA
- – OCRV Center
Replace Rv Roof La Habra, CA
I figured I would certainly rather have it semi-portable so I went with the cover, plus this enables me to adjust the height up and down when I require to. Certainly the most inexpensive choice of all would be to simply throw a great tarpaulin over the top of your motor home for stormy days and only service bright days! Originally I increased the legs with 1 1/2 PVC pipeline that fit inside the legs and afterwards I connected a hose pipe clamp around the PVC pipeline to hold up the cover legs.
I sawed 1 1/4 square legs from 24's to place inside the cover legs (once again holding the cover up with pipe clamps.) and strengthening the four edges with an added 24 screwed to it. This is still a little floppy. I possibly should have forked out for some inflexible steel pipe from the start.
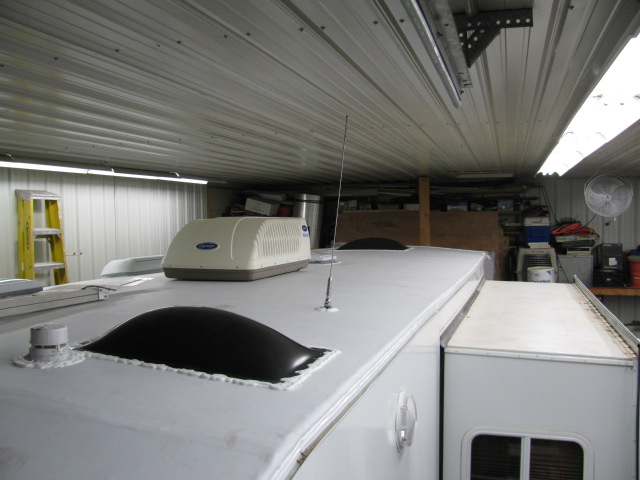
Fractures in the EPDM roofing at edge of camper (Rv Roof Leak Repair Near Me La Habra). An old patch task on the recreational vehicle rubber roofing system. Loads of caulk piled over old problem areas. As you can see, this roofing has actually had a great deal of issues throughout the years. Looking from the within the camper there have clearly been leakages in numerous locations of the roof covering.
On the base is the initial EPDM rubber roofing layer. I recognize it's EPDM rubber and not TPO rubber since of the black support. On top of my EPDM roofing system is a slim Recreational vehicle roofing covering that was applied later on.
Roof Repair For Rv La Habra, CA
I simply left the roof covering covering stayed with the EPDM roof covering and pulled them up together. (You do not require to peel them up independently.) Starting to remove roof covering finishing. Peeling up section of the bottom layer of rubber. This shows that the initial recreational vehicle roofing was EPDM as a result of the black backing.
I reduced lines with an energy blade around components. All rubber roof covering gotten rid of from camper. This step went rather swiftly. There was a glue under the lower layer of rubber that was still pretty well embeded lots of places, but with a great little force it peeled off up easily.
If you believe you'll be saving the roof decking plywood (not replacing it), after that you might conserve yourself some clean-up difficulty by getting rid of the components initially and after that peeling off up the rubber! Information of water damage on camper roof. More water harmed areas on motor home roof covering outdoor decking. There was absolutely nothing truly awful that made me seem like I was going to drop via, yet definitely a whole lot of damage and I was getting the feeling I would certainly be replacing a great deal of the roofing outdoor decking plywood.
Rv Rubber Roof Maintenance La Habra, CA
I went for the simplest one initially, a vent cap from a kitchen sink plumbing vent pipe. There is no various other way around this, you simply have to start digging until you subject the screw heads.

Unscrewing the screws in air vent cap. The screws on this vent cap were hex-head metal screws so I used a small socket motorist to remove them. Some appeared tidy. Others were rusted and I had to make use of a vice-grip pliers to grab the heads and turn them little bit by little.
I discovered an old wasp nest inside the vent cover. This is a view I'll possibly have to get made use of to, locating the remains of pet habitation in every nook and cranny. I spend an awful great deal of my time developing good wildlife environment in my yard so I don't obtain angered when an animal selects to establish up home in my motor home.
Rv Rubber Roof Maintenance La Habra, CA
Fortunately nobody was home in this old nest so I just tossed it. Probably I'll put a screen over it when replacing it. Which brings us to the next point. You must try not to damage these items (like vent covers and caps) as you're removing the old caulk and sealer simply in situation you need to use them once more.
One down, 7 more fixtures to go. Next I determined to tackle the only roof covering ventilation follower that my camper has. My roofing system vent additionally had an air vent cover over it. So I started scraping the substance from those screws. Beginning on the roof vent. Hardware subjected on roofing air vent cap, the first nut came off clean.
The bolts on this Motor home roofing system vent cover were nuts on small bolts. The 2nd one simply started rotating, implying the screw was not dealt with in location but turning along with the nut. A peek at the hardware holding down the roofing system vent cover.
Rv Roof Repair Fiberglass La Habra, CA
I really did not have any kind of great way to hold the bolt in place so rather I opted to saw with the bolts with a reciprocating saw. Sawing via screws on roof vent cover. I utilized a cordless reciprocating saw with a metal-cutting blade but it was tricky to obtain the blade flat enough to reach the screws so near to the roofing deck.
Flexing the blade a little bit to reach close to the roof deck. Cover removed from roof air vent.
Many were so old and rusted that they sheared off when I unscrewed then with a great deal of pressure. Loosening the braces that held the air vent cover in location. I scraped much more caulk and roofing system sealer off the flange of the roofing vent itself. I quickly uncovered there disappeared screws or equipment holding it down so I surrendered on the scuffing and went inside the motor home After scratching the caulk and sealant from flange of roofing system vent, say goodbye to screws! Unscrewing the inside cover plate of roofing air vent fan in RV bathroom.
Resealing Rv Roof La Habra, CA
I selected a drill little bit close to the size of the shaft of the screws that I had currently pulled out and began drilling. Choosing a drill bit for drilling out a screw head.
Shatterproof glass recommended. I pierced out the heads, one popped off and the various other I was getting annoyed with and gave it a pull before it was pierced through. Instead of standing out off the screw head, the plastic simply dissolved around the hot screw head. Whoops. Hope I don't need to reuse this cover.
All edge brackets got rid of, prepared to pull out. When the braces were out I returned up leading to tear out the the roofing air vent. Then I scuffed up all the continuing to be substances and rubber roofing. Taking off the old roof covering vent. There are two cables running to the roof covering vent (a black hot cable and a white neutral cable) that you'll need to clip to remove the old air vent.
Rv Roof Repair Service Near Me La Habra, CA
These are the cables attaching the roof airing vent follower. Roofing system air vent removed and cleaned up. After clipping the cord and removing the air vent, I cleansed up any kind of continuing to be goop and obtained my very first good look at the roofing system framework.
Some RV roofings are mounted with wood, others have steel framing. I scratched off some rust and made a big mess inside the restroom.
Oops. Perhaps I should have put a tarpaulin down. My final goal of the day was to obtain the fridge vent cover off. I discovered recreational vehicle sealer balls at four factors on the cover so assumed there should be screws under them. I pried them up and found Phillips screw heads.
Exposing the screws in the refrigerator vent cap. Peeling old RV roof covering finish on top of refrigerator air vent cap I additionally observed that there was a coat of motor home roofing finishing over the vent cap. These finishings are painted on with a brush so plainly whoever did this covering just blobbed know top of every little thing.
Rv Rubber Roof Replacement Cost La Habra, CA
Lifting off the cover of the fridge roof covering vent. As soon as the cap is off it's more of the very same. Cutting away much more rubber and removing RV roof sealant and old caulk. Get comfortable due to the fact that this fool has 32 screws in it! Ugh. Scuffing lap sealant and caulk from screw heads.
Tearing off the fridge roof vent after all screws are gotten rid of. Virtually every screw was in excellent enough condition to get rid of with a socket motorist, however a couple were also rusty and required to be turned out with vice grasp pliers.
Repair Rv Roof Leak La Habra, CA
I peeled the staying rubber roofing system from under the flange and after that removed the old putty underneath. I'll cleanse it much better if and when I decide to reuse it. Feels like it remains in suitable shape so I probably will. Removing the old putty from the flange of the refrigerator roofing vent.
That's as far as I jumped on day 1 after concerning 5 hours of lazy job. Not a bad start. I also saw this incredible sludge mold and mildew expanding in the mulch under the camper. If you have actually never seen a sludge mold and mildew, look into time gaps of them growing! They are freaking amazing! A scum mold under the camper! Currently remain to tip 2 when I eliminate the remainder of the roof fixtures!.
?.!!. When it pertains to motor home roof substitute, there are numerous variables to take into consideration. With time, your motor home's roofing can end up being worn, harmed, or develop leakages, which can jeopardize its honesty and bring about even more substantial concerns. If you're experiencing any one of these issues, it might be time to take into consideration changing your recreational vehicle roof covering.
There are a number of signs that indicate your RV needs a roof replacement. These indications include water leaks, sagging or soft spots on the roof, cracks or divides in the roof covering material, excessive wear and tear, and visible sunlight coming through the roofing. If you discover any of these indications, it is critical to resolve them immediately to avoid more damages to your recreational vehicle.
Rv Roof Repair La Habra, CA
Usually, recreational vehicle roof substitute expenses can vary from $2,000 to $10,000. It's essential to take into consideration the lasting benefits and prospective savings that come with purchasing a top notch roofing system substitute. When choosing a recreational vehicle roofing material, numerous elements enter into play. These consist of toughness, weight, insulation buildings, upkeep demands, and cost.
Making a decision in between a diy (DO IT YOURSELF) technique or specialist installation for your motor home roofing system substitute depends on your skills, experience, and available time. While DIY installation can save you money, it requires ample expertise and knowledge to make sure a correct and water tight setup. On the various other hand, specialist installment provides the advantage of proficiency, experience, and guarantees.
Examine and clean up the seamless gutters and downspouts to make sure correct drainage and prevent water merging on the roof. Apply a safety coating or sealant to the roof covering surface as recommended by the supplier. This can provide extra UV protection and assistance expand the life of the roof covering. Stay clear of strolling on the roof unless required.
The expense of installing a RV roof can differ based on factors like RV dimension, chosen roofing system product, and whether specialist installment is asked for. If your RV's roofing system is harmed, used out, or dripping, a roofing system replacement is commonly essential to guarantee the architectural stability of your Recreational vehicle.
Motorhome Roof Replacement La Habra, CA
Repairing a rip in a RV roof depends on the intensity and kind of roofing material. For small slits, you can use roof covering fixing tape or sealant specifically created for Motor home roof coverings.
Spending in a high-quality motor home roof covering layer can be worth it for long-lasting roof covering upkeep. Flex Seal items are frequently used as short-lived or quick-fix solutions for little leaks or cracks. While they might offer a short-term remedy, it's advised to talk to a professional and use correct recreational vehicle roofing system repair service materials for an extra long-term and reputable repair.
Repair Rv Roof La Habra, CA
PVC roofing systems provide superb toughness, resistance to UV rays, and reduced maintenance requirements. They are taken into consideration a trusted option for RV roofs, but the best selection depends on your certain needs and choices.
Resealing your motor home roofing must be done consistently to preserve its integrity and protect against leaks. As a general guideline, it's advised to reseal your motor home roofing system at the very least annually or as per the maker's referrals. Whether to leave your recreational vehicle slides in or out depends upon the circumstance and personal choice.
Motor home roofing leaks are relatively typical due to various factors such as age, wear and tear, incorrect upkeep, or extreme weather conditions. The choice to amount to a Recreational vehicle due to water damages depends on the extent of the damage and the insurance policy company's assessment.
Rubber Roof For Camper La Habra, CA
Insurance insurance coverage for recreational vehicle delamination depends on the details plan and the root cause of delamination. It is necessary to examine your insurance coverage and consult with your carrier to understand the coverage for delamination and any appropriate deductibles. Declaring water damage on a camper relies on your insurance plan and the scenarios surrounding the water damage.
Rv Slide Out Roof Repair La Habra, CARubber Roofing For Rv La Habra, CA
Class C Rv Roof Repair La Habra, CA
Rv Rubber Roof Replacement La Habra, CA
Rv Roof Leak Repair La Habra, CA
Rv Rubber Roof Repair La Habra, CA
Rubber Roofing For Campers La Habra, CA
Rubber Roofing For Campers La Habra, CA
Rubber Roof For Rv La Habra, CA
Rv Trailer Rubber Roof Repair La Habra, CA
Rubber Roof Installation La Habra, CA
Rv Roof Repair La Habra, CA
Rv Slide Out Roof Repair La Habra, CA
Rv Fiberglass Roof Repair La Habra, CA
Rv Roof Repair Service Near Me La Habra, CA
Rubber Roofing For Campers La Habra, CA
Rubber Roofing For Campers La Habra, CA
Repair Rv Roof La Habra, CA
Rubber Roof Installation La Habra, CA
Rv Rubber Roof Replacement La Habra, CA
Rv Roof Repair Fiberglass La Habra, CA
Rv Roof Replacement La Habra, CA
Rv Roof Repair La Habra, CA
Rv Rubber Roof Maintenance La Habra, CA
Roof Repair For Rv La Habra, CA
Rubber Roof For Rv La Habra, CA
Motorhome Roof Replacement La Habra, CA
Resealing Rv Roof La Habra, CA
Replace Rv Roof La Habra, CA
Repair Rv Roof La Habra, CA
Rv Roof Maintenance La Habra, CA
Replace Rv Roof La Habra, CA
Rv Slide Out Roof Repair La Habra, CA
Motorhome Roof Replacement La Habra, CA
Rv Fiberglass Roof Repair La Habra, CA
Epdm Rv Roof Repair La Habra, CA
Rv Roof Repair Service Near Me La Habra, CA
Epdm Rv Roof Repair La Habra, CA
Rv Rubber Roof Replacement La Habra, CA
Best Rv Roof Repair La Habra, CA
Motorhome Roof Replacement La Habra, CA
Rubber Roofing For Rv La Habra, CA
Rv Rubber Roof Repair La Habra, CA
Rv Rubber Roof Replacement La Habra, CA
Rubber Roof For Rv La Habra, CA
Best Rv Roof Repair La Habra, CA
Best Rv Roof Repair La Habra, CA
Repair Rv Roof Leak La Habra, CA
Rv Roof Repair Fiberglass La Habra, CA
Rv Fiberglass Roof Repair La Habra, CA
Rubber Roof For Rv La Habra, CA
Rubber Roofing For Rv La Habra, CA
Motorhome Roof Replacement La Habra, CA
Epdm Rv Roof Repair La Habra, CA
Class C Rv Roof Repair La Habra, CA
Rv Rubber Roof Replacement La Habra, CA
Rv Roof Repair Near Me La Habra, CA
Rv Rubber Roof Replacement Cost La Habra, CA
Resealing Rv Roof La Habra, CA
Rv Roof Repair Service Near Me La Habra, CA
Rv Trailer Rubber Roof Repair La Habra, CA
Rubber Roofing For Campers La Habra, CA
Rv Rubber Roof Replacement Cost La Habra, CA
Rubber Roof For Rv La Habra, CA
Rv Rubber Roof Repair La Habra, CA
Rv Roof Repair La Habra, CA
Rubber Roof Installation La Habra, CA
Repair Rv Roof Leak La Habra, CA
Rv Roof Leak Repair Near Me La Habra, CA
Rv Roof Repair Near Me La Habra, CA
Rv Roof Replacement La Habra, CA
Motorhome Roof Replacement La Habra, CA
Rubber Roof For Camper La Habra, CA
Rv Roof Maintenance La Habra, CA
Roof Repair For Rv La Habra, CA
Best Rv Roof Repair La Habra, CA
Rv Rubber Roof Replacement Cost La Habra, CA
Rubber Roofing For Campers La Habra, CA
Near My Location Seo Marketing Agency La Habra, CA
Finding A Good Seo Services For Business La Habra, CA
OCRV Center
Table of Contents
- – Replace Rv Roof La Habra, CA
- – OCRV Center
- – Roof Repair For Rv La Habra, CA
- – Rv Rubber Roof Maintenance La Habra, CA
- – Rv Rubber Roof Maintenance La Habra, CA
- – Rv Roof Repair Fiberglass La Habra, CA
- – Resealing Rv Roof La Habra, CA
- – Rv Roof Repair Service Near Me La Habra, CA
- – Rv Rubber Roof Replacement Cost La Habra, CA
- – Repair Rv Roof Leak La Habra, CA
- – Rv Roof Repair La Habra, CA
- – Motorhome Roof Replacement La Habra, CA
- – Repair Rv Roof La Habra, CA
- – Rubber Roof For Camper La Habra, CA
- – OCRV Center
Latest Posts
Kitchen Hood Grease Removal Beverly Hills
Kitchen Exhaust Cleaning Service Tujunga
Home Ac Repair North Hills
More
Latest Posts
Kitchen Hood Grease Removal Beverly Hills
Kitchen Exhaust Cleaning Service Tujunga
Home Ac Repair North Hills