All Categories
Featured
Table of Contents
- – Rv Trailer Roof Repair Villa Park, CA
- – OCRV Center
- – Repair Rv Roof Villa Park, CA
- – Roof Repair For Rv Villa Park, CA
- – Rubber Roof For Rv Villa Park, CA
- – Rubber Roof Installation Villa Park, CA
- – Resealing Rv Roof Villa Park, CA
- – Rv Rubber Roof Maintenance Villa Park, CA
- – Roof Repair For Rv Villa Park, CA
- – Rv Rubber Roof Maintenance Villa Park, CA
- – Rv Slide Out Roof Repair Villa Park, CA
- – Rubber Roofing For Rv Villa Park, CA
- – Rubber Roofing For Campers Villa Park, CA
- – Rubber Roofing For Campers Villa Park, CA
- – Resealing Rv Roof Villa Park, CA
- – Rv Roof Repair Fiberglass Villa Park, CA
- – OCRV Center
Rv Trailer Roof Repair Villa Park, CA
I propped up the front shift item which, like the back one, is a layer of 1/8 inch plywood with a fiberglass panel get in touch with cemented with each other. The front shift has the very same handle the front clearance lights wired in parallel with it. The timber mounting looks adequate here so I maintained it.
As stated earlier I chose to keep the sheet at the end of this picture due to the fact that it was basically intact. In retrospect I most likely must have kept the one I'm regarding to pull off. You'll soon see what a discomfort it is to replace! Very carefully raising this sheet of 1/8 Inch ply from the roofing system.
Repair Rv Roof Villa Park, CA
It basically manages a thin layer of the foam. Here's a check out all the electrical wiring underneath this item of ply and sandwiched inside the ceiling. Likewise you can see exactly how the steel framework is set up. Unsure what that timber box is for on the right? There's no opening inside.
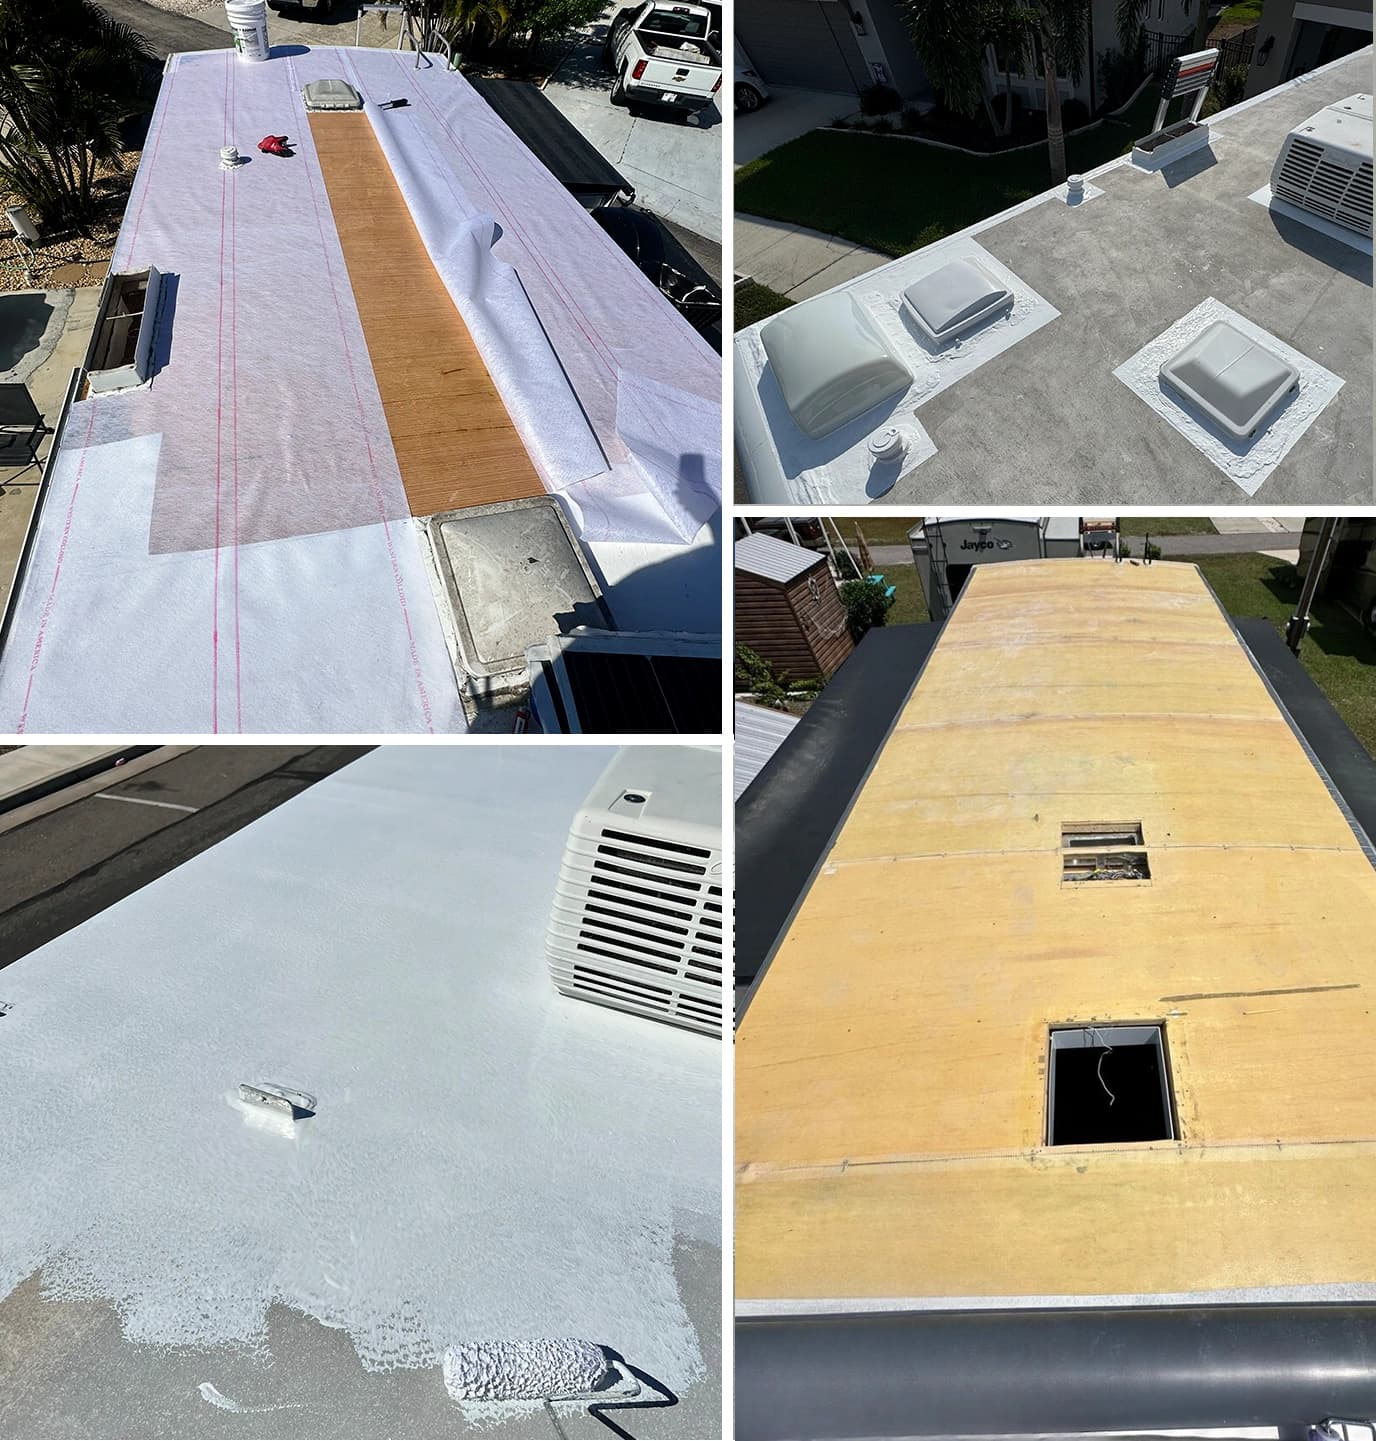
An introduction of the front of the camper with 2 sheets of roofing ply removed. I drew out the ones I can and the remainder I either sawed off or nipped off with a grinder wheel.
That's regarding it for eliminating the old water damage. Next it's time to mount the brand-new roof substrate!.
?.!!. Below are some images of a job I did to fix roofing system rot on my fifth wheel camper. I chose to utilize this technique due to the fact that I could do it myself with my own resources and abilities. Otherwise, a great deal of hardware, including the ladder and roofing rack, the endcap and the filon external wall would have needed to be abused.
Roof Repair For Rv Villa Park, CA
I used products from The Rot Doctor. They were extremely helpful in reviewing my options and in describing the strategies to utilized their products.
Folding back the rubber disclosed the rotten location. I cut a piece of plywood like a challenge to match the form of the hole I made in the roofing.
Rubber Roof For Rv Villa Park, CA
Right here's the sprayer I made use of to use the CPES * from The Rot Medical professional. With its 18 metal "wand" I might probe right into the 2 space between the roofing system and the ceiling.
6. Below's the finished roof covering sealed up with Eternabond tape. I ran a strip of Eternabond all the way throughout the camper where the roof meets the endcap. Any fears of a leakage right here are a point of the past. 7. I also had rot in the wall directly listed below the area on the roofing.
I completely dried the location for several days using the exhaust side of a little vacuum cleaner, placing the hose in between the inner and outer walls. When it was thoroughly completely dry I covered every little thing with CPES *, utilizing the pest sprayer to permeate into or else unattainable areas.
Note the top 3-4 of the stud was completely rotted away. I spread out Fill-It Epoxy Filler * throughout the location. The stuff goes on like a thick and sticky gel, after that dries out to a really difficult product that bonds to the CPES * I had actually sprayed onto the wood.
Rubber Roof Installation Villa Park, CA
Finally, here's the ended up item. Total expense was concerning $200.00 plus a number of hours of my time. * These items are unavailable, we are selling similar items that will carry out these same tasks. Feel totally free to call us if you require aid with which products to make use of.
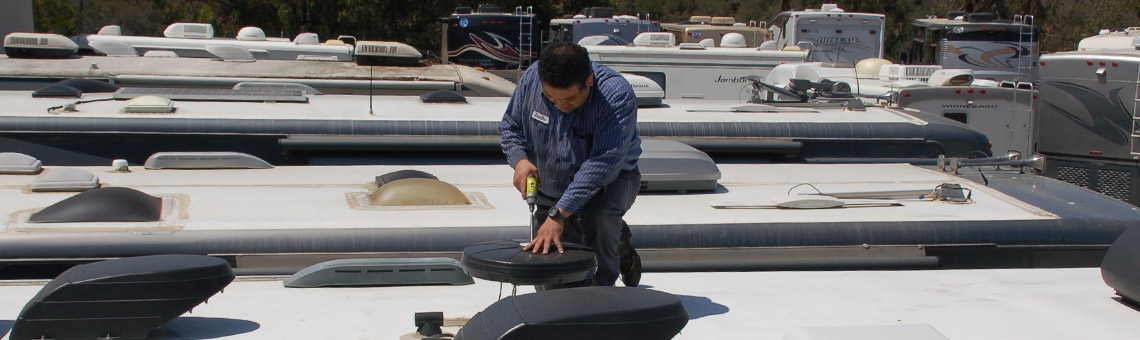
In this message, we desire to share with you just how to DIY Motor home roof repair work. Knowing just how to DIY a whole lot of the points that can damage or mess up will certainly conserve you not only a whole lot of money on RV repair work however can likewise conserve you a whole lot of possible time in the store!
I may receive a small commission when you make an acquisition using my link. We try to plan our courses thoroughly to prevent low-hanging objects over the road. This is how we ended up with a couple of small tears on the roofing of our Motor home.
We thought we were clear of the branches, but we wound up catching a few of them on the far left side of the roofing system. There were a total of 4-5 small openings in the side of the roof. Initially, we didn't inspect the roofing since we didn't think we hit anything.
Resealing Rv Roof Villa Park, CA
One of the rips in our motor home roof covering A few weeks later, we endured a serious thunderstorm and a LOT of rain. During the storm, we located that we had a tiny amount of water dripping with one of the light fixtures in the restroom. The good news is, we did not wind up with any kind of irreversible water damage.
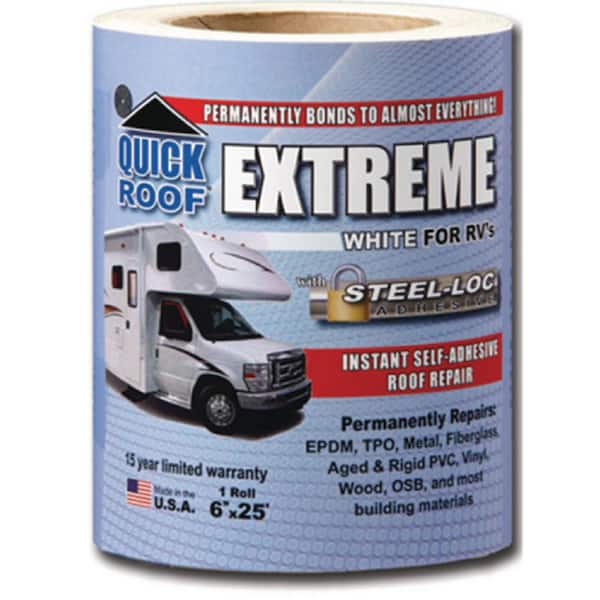
He covered it as finest he can with sturdy gorilla tape and then got the materials required to do a recreational vehicle roof covering fixing. The EPDM rubber roof covering material that many Motor homes come with is typically quite tough as much as roofing products go. Rubber roofings last for several years, yet they do tear if caught hard sufficient.
In our situation, this suggested eliminating the gorilla tape that we had actually utilized as a short-lived fix while we awaited the materials we bought to arrive. You'll desire to cleanse the location around the tear that you will be patching well. This enables the spot to correctly stick and will prevent future leakages.
To clean up the roof, use massaging alcohol and either a rag or paper towels. Tucker went over the area 2-3 times to see to it it was cleaned actually well. Let it dry totally prior to proceeding. Using the Externabond tape After the area has extensively dried out from cleansing, it's time to include the Eternabond tape, which is a RV roofing repair work tape.
Rv Rubber Roof Maintenance Villa Park, CA
You will certainly wish to measure out just how much you need and reduce an item accordingly. Get rid of the support and use thoroughly over the tear in the roof. Once it has touched the roofing, it adheres rather rapidly, so you'll wish to make certain and setting it right the very first time.
Press strongly and remain to rub it and smooth out the patch for several minutes. Using a caulk weapon, coat the whole spot with Dicor 501LSW-1 Epdm Self-Leveling Lap Sealant. This rubber sealer produces a secure second seal on your rubber roof and makes certain that the leak is correctly secured.
There are a great deal of Dicor motor home roofing system repair service products that you can acquire consisting of roofing system layers, roof sealant, and extra for the surface area of your roofing system. Using the Dicor lap sealer Start on the brink and work your means around the entire patch, loading in the center as you go.
Wipe any type of excess off and do not enable it to run down as well much. This is a self-leveling sealer so you must end up with a rather level patch. According to the maker, it will certainly be waterproof in 4 hours, 80% cured in 2 days, and 100% treated in thirty days.
Roof Repair For Rv Villa Park, CA
To change an entire motor home roofing with substantial damages would certainly result in a lot even more costly repairs. I really hope that you have actually found the information in this article handy. Be sure and pin this article for future recommendation in case you may need it in the future! To stop recreational vehicle roof covering concerns, checking your roofing system regularly during recreational vehicle upkeep is an excellent concept.
Folding back the rubber disclosed the rotten location. I reduced a piece of plywood like a problem to match the shape of the hole I made in the roofing system.
Rv Rubber Roof Maintenance Villa Park, CA
Below's the sprayer I made use of to apply the CPES * from The Rot Medical professional. With its 18 metal "wand" I might penetrate into the 2 room in between the roofing system and the ceiling.
Right here's the finished roofing system sealed up with Eternabond tape. I ran a strip of Eternabond all the method throughout the camper where the roof satisfies the endcap. I additionally had rot in the wall surface straight below the location on the roof.
Rv Slide Out Roof Repair Villa Park, CA
I completely dried the location for a number of days utilizing the exhaust side of a tiny vacuum cleaner, inserting the pipe in between the internal and outer wall surfaces. When it was completely completely dry I coated whatever with CPES *, utilizing the pest sprayer to permeate right into or else hard to reach locations.
Keep in mind the top 3-4 of the stud was entirely deteriorated away - Best Rv Roof Repair Villa Park. I think now the structure is as solid as the original manufacture. 9. I spread out Fill-It Epoxy Filler * throughout the location. Not rather, however after that it will be concealed later. The things goes on like a thick and sticky gel, after that dries out to an extremely hard product that bonds to the CPES * I had sprayed onto the wood.
Right here's the ended up product. Really feel cost-free to contact us if you require assistance with which products to use.
Rubber Roofing For Rv Villa Park, CA
In this post, we want to share with you exactly how to DIY Recreational vehicle roofing system fixing. Understanding exactly how to DIY a lot of the points that can break or mess up will conserve you not only a great deal of cash on Motor home repair work yet can also save you a lot of potential time in the store!
I might receive a small commission when you make a purchase using my web link. We try to intend our paths meticulously to avoid low-hanging things over the roadway. This is exactly how we ended up with a few small splits on the roofing of our RV.
We assumed we were clear of the branches, yet we ended up catching a few of them on the far left side of the roofing. There were an overall of 4-5 little openings in the side of the roofing system. We really did not examine the roof covering because we really did not believe we strike anything.
Rubber Roofing For Campers Villa Park, CA
Among the tears in our recreational vehicle roof A couple of weeks later on, we endured a severe electrical storm and a whole lot of rain. Throughout the tornado, we located that we had a small amount of water dripping via one of the lighting fixtures in the restroom. Thankfully, we did not end up with any kind of long-term water damages.
He covered it as ideal he can with durable gorilla tape and after that ordered the products required to do a motor home roof covering repair. The EPDM rubber roof material that a lot of RVs feature is generally rather hard as for roof products go. Rubber roof coverings last for years, but they do tear if captured hard enough.
In our situation, this suggested getting rid of the gorilla tape that we had actually made use of as a momentary repair while we waited on the materials we purchased to get here. You'll intend to clean up the location around the tear that you will be covering well. This allows the patch to appropriately adhere and will stop future leakages.
Rubber Roofing For Campers Villa Park, CA
To clean up the roof, use massaging alcohol and either a rag or paper towels., which is a RV roof repair work tape.
You will intend to ration just how much you require and cut an item appropriately. Get rid of the support and apply very carefully over the tear in the roofing system. Once it has actually touched the roof covering, it adheres rather promptly, so you'll want to make certain and placement it right the very first time.
Press securely and remain to scrub it and smooth out the spot for numerous mins. Making use of a caulk gun, layer the whole patch with Dicor 501LSW-1 Epdm Self-Leveling Lap Sealer. This rubber sealer develops a safe second seal on your rubber roofing and makes sure that the leakage is correctly secured.
Resealing Rv Roof Villa Park, CA
There are a lot of Dicor RV roofing repair service items that you can purchase including roof coatings, roof sealer, and extra for the surface of your roof. Best Rv Roof Repair Villa Park. Applying the Dicor lap sealer Start on the edges and work your means around the entire patch, filling in the middle as you go
Wipe any excess off and don't enable it to run down as well much. This is a self-leveling sealant so you ought to finish up with a fairly level spot. According to the maker, it will certainly be water resistant in 4 hours, 80% healed in 2 days, and 100% healed in 30 days.
Rv Roof Repair Fiberglass Villa Park, CA
OCRV Center
Address: 23281 La Palma Ave Yorba Linda, CA 92887Phone: (714) 909-1444
Email: [email protected]
OCRV Center
To replace an entire recreational vehicle roofing with significant damage would result in far more expensive fixings. I hope that you have discovered the information in this blog post handy. Make certain and pin this blog post for future reference in case you might require it later! To avoid motor home roof concerns, inspecting your roofing system regularly throughout RV maintenance is a great idea.
Repair Rv Roof Leak Villa Park, CABest Rv Roof Repair Villa Park, CA
Rv Roof Repair Near Me Villa Park, CA
Rv Roof Leak Repair Villa Park, CA
Rv Roof Leak Repair Near Me Villa Park, CA
Rv Trailer Roof Repair Villa Park, CA
Motorhome Roof Replacement Villa Park, CA
Rubber Roofing For Rv Villa Park, CA
Rv Slide Out Roof Repair Villa Park, CA
Rv Roof Repair Near Me Villa Park, CA
Rv Rubber Roof Repair Villa Park, CA
Rv Roof Repair Villa Park, CA
Repair Rv Roof Leak Villa Park, CA
Rv Trailer Roof Repair Villa Park, CA
Rubber Roof For Rv Villa Park, CA
Rubber Roof For Rv Villa Park, CA
Rv Roof Maintenance Villa Park, CA
Class C Rv Roof Repair Villa Park, CA
Motorhome Roof Replacement Villa Park, CA
Rv Roof Repair Villa Park, CA
Rubber Roof Installation Villa Park, CA
Motorhome Roof Replacement Villa Park, CA
Rubber Roof For Rv Villa Park, CA
Rv Roof Leak Repair Villa Park, CA
Repair Rv Roof Leak Villa Park, CA
Rubber Roof Installation Villa Park, CA
Rubber Roofing For Rv Villa Park, CA
Rv Fiberglass Roof Repair Villa Park, CA
Rv Trailer Rubber Roof Repair Villa Park, CA
Rv Trailer Rubber Roof Repair Villa Park, CA
Repair Rv Roof Villa Park, CA
Rv Roof Replacement Villa Park, CA
Rv Roof Leak Repair Villa Park, CA
Rv Rubber Roof Replacement Villa Park, CA
Rv Trailer Roof Repair Villa Park, CA
Rv Roof Repair Near Me Villa Park, CA
Motorhome Roof Replacement Villa Park, CA
Rv Roof Repair Near Me Villa Park, CA
Rv Fiberglass Roof Repair Villa Park, CA
Rv Roof Repair Fiberglass Villa Park, CA
Rv Roof Leak Repair Near Me Villa Park, CA
Rv Trailer Roof Repair Villa Park, CA
Repair Rv Roof Villa Park, CA
Rv Roof Repair Service Near Me Villa Park, CA
Rv Trailer Rubber Roof Repair Villa Park, CA
Motorhome Roof Replacement Villa Park, CA
Epdm Rv Roof Repair Villa Park, CA
Repair Rv Roof Villa Park, CA
Rv Roof Repair Fiberglass Villa Park, CA
Rubber Roof Installation Villa Park, CA
Repair Rv Roof Villa Park, CA
Rv Roof Leak Repair Near Me Villa Park, CA
Repair Rv Roof Leak Villa Park, CA
Rubber Roof Installation Villa Park, CA
Rubber Roofing For Rv Villa Park, CA
Repair Rv Roof Leak Villa Park, CA
Rv Slide Out Roof Repair Villa Park, CA
Rv Rubber Roof Replacement Villa Park, CA
Rv Fiberglass Roof Repair Villa Park, CA
Rubber Roofing For Campers Villa Park, CA
Rv Roof Maintenance Villa Park, CA
Rv Roof Maintenance Villa Park, CA
Rv Fiberglass Roof Repair Villa Park, CA
Rubber Roof Installation Villa Park, CA
Replace Rv Roof Villa Park, CA
Epdm Rv Roof Repair Villa Park, CA
Roof Repair For Rv Villa Park, CA
Rubber Roofing For Campers Villa Park, CA
Rv Roof Replacement Villa Park, CA
Rv Rubber Roof Replacement Cost Villa Park, CA
Rubber Roof For Camper Villa Park, CA
Rv Roof Repair Near Me Villa Park, CA
Rv Slide Out Roof Repair Villa Park, CA
Roof Repair For Rv Villa Park, CA
Rv Roof Leak Repair Near Me Villa Park, CA
Rubber Roof For Rv Villa Park, CA
Rv Roof Repair Near Me Villa Park, CA
Class C Rv Roof Repair Villa Park, CA
Around Here Seo Services Villa Park, CA
Affordable Seo Companies Near Me Villa Park, CA
OCRV Center
Table of Contents
- – Rv Trailer Roof Repair Villa Park, CA
- – OCRV Center
- – Repair Rv Roof Villa Park, CA
- – Roof Repair For Rv Villa Park, CA
- – Rubber Roof For Rv Villa Park, CA
- – Rubber Roof Installation Villa Park, CA
- – Resealing Rv Roof Villa Park, CA
- – Rv Rubber Roof Maintenance Villa Park, CA
- – Roof Repair For Rv Villa Park, CA
- – Rv Rubber Roof Maintenance Villa Park, CA
- – Rv Slide Out Roof Repair Villa Park, CA
- – Rubber Roofing For Rv Villa Park, CA
- – Rubber Roofing For Campers Villa Park, CA
- – Rubber Roofing For Campers Villa Park, CA
- – Resealing Rv Roof Villa Park, CA
- – Rv Roof Repair Fiberglass Villa Park, CA
- – OCRV Center
Latest Posts
Medicare Dental Insurance For Seniors Lake Forest
Best Senior Insurance Fountain Valley
Stanton Best Health Insurance Plans Near Me
More
Latest Posts
Medicare Dental Insurance For Seniors Lake Forest
Best Senior Insurance Fountain Valley
Stanton Best Health Insurance Plans Near Me