All Categories
Featured
Table of Contents
- – Repair Rv Roof Guasti, CA
- – OCRV Center
- – Replace Rv Roof Guasti, CA
- – Rv Rubber Roof Replacement Guasti, CA
- – Rubber Roofing For Campers Guasti, CA
- – Rv Trailer Rubber Roof Repair Guasti, CA
- – Resealing Rv Roof Guasti, CA
- – Rv Rubber Roof Replacement Guasti, CA
- – Rv Slide Out Roof Repair Guasti, CA
- – Resealing Rv Roof Guasti, CA
- – Rv Roof Repair Service Near Me Guasti, CA
- – Rv Roof Repair Guasti, CA
- – Motorhome Roof Replacement Guasti, CA
- – Resealing Rv Roof Guasti, CA
- – Rv Trailer Roof Repair Guasti, CA
- – OCRV Center
Repair Rv Roof Guasti, CA
For fiberglass roofings, initial sanding is recommended to guarantee the finishing adheres properly.: Treating times differ with temperature and moisture. If the layer starts to skin over in the pail, remove this layer and mix well prior to continuing. For application, common paint rollers are suitableapply with a light touch, but do not be reluctant with the amount of finish you roll on.
We stand by the quality of our product with a 100% Lifetime Warranty, offering you with complete self-confidence in your acquisition. That's exactly how simple it is to repair your RV's roof covering and forget doing roof upkeep ever before once again. Go ahead and recover your roofing system for the last time now.
Acetone and cloths for a last clean (available at stores like Home Depot or Walmart). Single use paint brushes, rollers, and pole extensions (can be located in a Dollar Shop). Paint tray and small bucket Non reusable handwear covers Painter's tape.
Membrane layer can be glued either side down. Single-Ply membrane layers are the very same color throughout. Membrane layer must be mounted onto tidy wood surface, do not mount in addition to existing membrane layer, adhesive, etc. Router all air vent and accessory openings. Sand all openings, seams, and sides to a smooth finish. Remove all debris off roof covering with air hose pipe.
Replace Rv Roof Guasti, CA
That is, fold it in half so half of the roofing is exposed. Apply glue in a damp film density of 8-10 mils with a short-napped paint roller to the revealed half of the roofing system decking, brush can be utilized yet is much more difficult.
- Remove all air pockets and wrinkles with a squeegee (grey neoprene head will not touch) or linoleum roller; press strongly working from the facility outward towards the edges, do not get on the roof throughout this time around. All wrinkles have to be removed at this point for a quality installment.
Alternate technique, standard membrane layer in area using" staples 3"-5" apart then use bar. If roof-edge moldings are not installed on roof throughout this time membrane will peel-up as drying out.
Rv Rubber Roof Replacement Guasti, CA
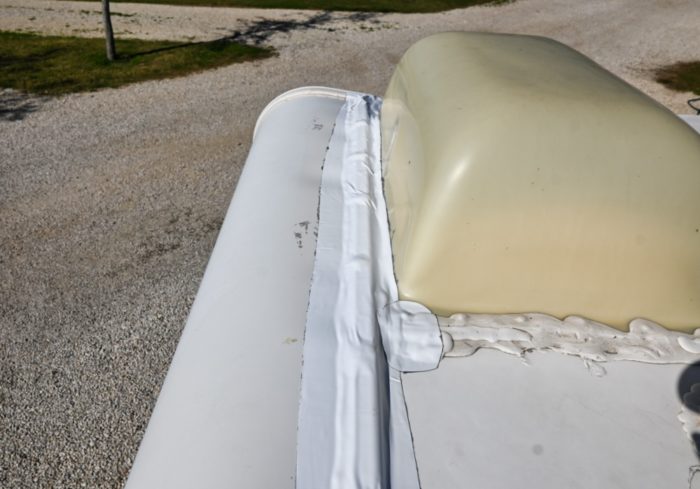
Both edges of the front and rear roof covering molding have to be sealed with caulk/sealant. Utilizing an energy blade "x" cut all roof covering openings.
To attain ideal bond, use to both substratums with 5-6 mil layer weight and allow to completely dry, after that laminate to membrane and apply stress with roller to insure 100% get in touch with. Diluent Water, if called for. Usage as obtained. Clean-up needs just warm water. Shop item in a cool, dry area. Item must not be stored in direct sunshine.
Eye get in touch with If product contacts eye, flush with water for at least 15 mins and look for clinical attention instantly. Skin call If item get in touches with skin, clean influenced location with soap and water.
Rubber Roofing For Campers Guasti, CA
Area nozzle right into joint and apply sealant into space. Remove concealing tape quickly. Clean hands and tools extensively prior to cleaning with soap and water.
In instance of eye call flush eyes with water for 15 minutes and call a medical professional. In situation of skin call, completely wash skin with soap and water.
Rv Trailer Rubber Roof Repair Guasti, CA
My motor home roof that requires to be replaced! Invite to my Recreational Vehicle Remodelling Collection!.?.!! So you want a motor home but can't manage one. If you resemble me and have even more time than money, then maybe your best alternative is to get an old recreational vehicle and fix it up. If you occur to locate a really good offer, then possibilities are it has water damage.
I get it. I purchased my Motor home over a year ago and didn't have the intestines to begin tackling this task till today. I purchased this 1993 Jamboree for $5000.
Resealing Rv Roof Guasti, CA
Water damages! I have actually never ever functioned on a Recreational vehicle prior to and I have to admit, I'm afraid. Hopefully if you're considering doing this yourself, adhering to along on my Motor home roofing system substitute task will certainly offer you the courage to dive in!
That seemed to be my cheapest alternative.
I figured I would certainly instead have it semi-portable so I went with the canopy, plus this allows me to change the height backwards and forwards when I need to. Guasti Rv Slide Out Roof Repair. Of training course the most affordable option of all would certainly be to just throw a good tarpaulin over the top of your motor home for stormy days and only deal with warm days! Initially I increased the legs with 1 1/2 PVC pipeline that fit inside the legs and afterwards I connected a hose pipe clamp around the PVC pipe to stand up the cover legs
Rv Rubber Roof Replacement Guasti, CA
This is still a little floppy. I possibly ought to have forked out for some inflexible steel pipe from the start.
Cracks in the EPDM roof covering at side of camper. An old spot work on the RV rubber roofing system. Tons of caulk stacked over old issue areas. As you can see, this roof covering has had a great deal of issues for many years. Looking from the inside of the camper there have plainly been leakages in many areas of the roof covering.
On the base is the initial EPDM rubber roofing system layer. I recognize it's EPDM rubber and not TPO rubber because of the black support. On top of my EPDM roofing is a thin RV roofing finishing that was applied later.
Rv Slide Out Roof Repair Guasti, CA
I just left the roof covering adhered to the EPDM roof covering and pulled them up together. (You don't require to peel them up individually.) Beginning to peel off roofing layer. Peeling up area of the lower layer of rubber. This shows that the original recreational vehicle roof covering was EPDM as a result of the black backing.
I reduced lines with an energy knife around components. All rubber roofing gotten rid of from camper. This action went quite promptly. There was a sticky under the bottom layer of rubber that was still pretty well stuck in numerous places, yet with a good little pressure it peeled up cleanly.
Resealing Rv Roof Guasti, CA
Now I might see all the harmed plywood roof outdoor decking underneath. I chose to peel off the rubber prior to eliminating fixtures simply so I might see what I was dealing with.
If you think you'll be conserving the roofing system decking plywood (not replacing it), then you could save yourself some cleanup difficulty by eliminating the fixtures first and afterwards peeling up the rubber! Detail of water damage on camper roofing. Much more water harmed areas on motor home roof outdoor decking. There was absolutely nothing really dreadful that made me seem like I was mosting likely to fall through, yet most definitely a great deal of damage and I was obtaining the sensation I would be replacing a lot of the roof decking plywood.
I chose the most basic one first, an air vent cap from a kitchen area sink plumbing vent pipeline. Beginning to scuff caulk and sealant. I used a tight scraper with a chisel-like blade and simply began spying and breaking and scratching and hacking. There is nothing else way around this, you simply need to start digging up until you reveal the screw heads.
Unscrewing the screws in vent cap. The screws on this air vent cap were hex-head metal screws so I made use of a small outlet driver to remove them.
Rv Roof Repair Service Near Me Guasti, CA
I found an old wasp nest inside the air vent cover. This is a view I'll possibly have to obtain made use of to, locating the remains of animal habitation in every nook and cranny. I spend a terrible great deal of my time creating good wild animals environment in my backyard so I don't get upset when a creature picks to set up home in my motor home.
Luckily nobody was home in this old nest so I just threw it. Possibly I'll place a screen over it when replacing it. Which brings us to the following point. You should attempt not to damage these pieces (like vent covers and caps) as you're scraping off the old caulk and sealant simply in case you require to use them once more.
My roofing system vent likewise had an air vent cover over it. Beginning on the roof covering air vent. Equipment exposed on roof covering vent cap, the initial nut came off clean.
Rv Roof Repair Guasti, CA
Screw is rotating. The bolts on this motor home roof covering air vent cover were nuts on little screws. The first one came off fine with an expansion socket kit. The 2nd one simply began rotating, suggesting the bolt was not taken care of in area however turning in addition to the nut. Bummer. A peek at the hardware holding back the roofing vent cover.
I didn't have any type of great way to hold the screw in position so rather I opted to saw with the screws with a reciprocating saw. Sawing via screws on roofing air vent cover - Guasti Rv Slide Out Roof Repair. I utilized a cordless reciprocating saw with a metal-cutting blade however it was complicated to get the blade flat adequate to get to the bolts so near the roof covering deck
Flexing the blade a little to reach near to the roof covering deck. When I had actually sawn through the continuing to be 3 bolts, I tore up the cover. The braces that were holding the cover in position. Cover gotten rid of from roof vent. Then I unscrewed the braces from the flange of the air vent follower itself.
Most were so old and rusted that they sheared off when I unscrewed after that with a great deal of force. Unscrewing the brackets that held the vent cover in area. I scratched much more caulk and roofing system sealer off the flange of the roof covering vent itself. I soon found there disappeared screws or hardware holding it down so I surrendered on the scraping and went inside the recreational vehicle After scratching the caulk and sealer from flange of roof vent, say goodbye to screws! Unscrewing the within cover plate of roofing air vent follower in RV bathroom.
Motorhome Roof Replacement Guasti, CA
A couple sheared off with a great deal of force, however 2 wouldn't budge. I had to drill out the screw heads. I picked a drill little bit near to the dimension of the shaft of the screws that I had actually already drawn out and began drilling. Picking a drill bit for drilling out a screw head.
Instead of popping off the screw head, the plastic just thawed away around the warm screw head. Hope I do not have to reuse this cover.
All edge braces eliminated, prepared to take out. When the braces were out I went back up top to pry out the the roof covering air vent. After that I scratched up all the continuing to be cruds and rubber roof. Taking off the old roof covering vent. There are 2 wires going to the roof covering vent (a black hot wire and a white neutral wire) that you'll need to clip to remove the old air vent.
Resealing Rv Roof Guasti, CA
These are the cables attaching the roofing venting follower. Roof covering vent removed and cleansed up. After clipping the cable and getting rid of the vent, I cleaned up any kind of staying goop and got my initial good appearance at the roofing system framework.
Some motor home roof coverings are mounted with timber, others have metal framing. I had no idea what was in my camper till this factor. Not also satisfied regarding the amount of corrosion on it, but with any luck it is still structurally sound! I scraped off some corrosion and made a large mess inside the washroom.

My last objective of the day was to obtain the refrigerator air vent cover off. I discovered Recreational vehicle sealer balls at 4 points on the cover so assumed there should be screws under them.
Rv Trailer Roof Repair Guasti, CA
Subjecting the screws in the refrigerator air vent cap. Removing old motor home roof layer in addition to refrigerator vent cap I likewise observed that there was a coat of RV roof covering finishing over the air vent cap. These layers are painted on with a brush so plainly whoever did this finishing just blobbed know top of everything.
Rv Rubber Roof Replacement Guasti, CARv Roof Repair Guasti, CA
Rv Roof Repair Service Near Me Guasti, CA
Resealing Rv Roof Guasti, CA
Rv Roof Repair Guasti, CA
Rv Roof Repair Guasti, CA
Rv Roof Maintenance Guasti, CA
Rubber Roof Installation Guasti, CA
Rv Roof Repair Service Near Me Guasti, CA
Rv Rubber Roof Repair Guasti, CA
Rv Roof Repair Service Near Me Guasti, CA
Repair Rv Roof Guasti, CA
Epdm Rv Roof Repair Guasti, CA
Motorhome Roof Replacement Guasti, CA
Rv Slide Out Roof Repair Guasti, CA
Resealing Rv Roof Guasti, CA
Epdm Rv Roof Repair Guasti, CA
Rv Roof Repair Fiberglass Guasti, CA
Resealing Rv Roof Guasti, CA
Resealing Rv Roof Guasti, CA
Rv Roof Repair Guasti, CA
Rubber Roofing For Campers Guasti, CA
Rv Roof Leak Repair Near Me Guasti, CA
Epdm Rv Roof Repair Guasti, CA
Rubber Roof Installation Guasti, CA
Class C Rv Roof Repair Guasti, CA
Rv Rubber Roof Repair Guasti, CA
Rubber Roofing For Campers Guasti, CA
Rv Roof Repair Service Near Me Guasti, CA
Rubber Roof Installation Guasti, CA
Repair Rv Roof Guasti, CA
Rv Roof Repair Guasti, CA
Resealing Rv Roof Guasti, CA
Rubber Roof For Rv Guasti, CA
Rv Roof Replacement Guasti, CA
Rv Rubber Roof Replacement Guasti, CA
Rv Roof Replacement Guasti, CA
Rv Rubber Roof Maintenance Guasti, CA
Rv Roof Repair Fiberglass Guasti, CA
Rubber Roof Installation Guasti, CA
Motorhome Roof Replacement Guasti, CA
Rubber Roof For Rv Guasti, CA
Repair Rv Roof Leak Guasti, CA
Rv Roof Leak Repair Guasti, CA
Rubber Roof For Rv Guasti, CA
Rubber Roofing For Campers Guasti, CA
Roof Repair For Rv Guasti, CA
Class C Rv Roof Repair Guasti, CA
Repair Rv Roof Leak Guasti, CA
Rv Rubber Roof Repair Guasti, CA
Rubber Roofing For Rv Guasti, CA
Replace Rv Roof Guasti, CA
Rv Roof Replacement Guasti, CA
Rv Rubber Roof Replacement Cost Guasti, CA
Rv Roof Repair Guasti, CA
Repair Rv Roof Leak Guasti, CA
Motorhome Roof Replacement Guasti, CA
Rubber Roof For Rv Guasti, CA
Rv Slide Out Roof Repair Guasti, CA
Rv Roof Replacement Guasti, CA
Rv Rubber Roof Maintenance Guasti, CA
Rubber Roof Installation Guasti, CA
Rv Rubber Roof Repair Guasti, CA
Class C Rv Roof Repair Guasti, CA
Rv Roof Repair Fiberglass Guasti, CA
Rv Roof Leak Repair Near Me Guasti, CA
Repair Rv Roof Guasti, CA
Rv Roof Replacement Guasti, CA
Best Rv Roof Repair Guasti, CA
Repair Rv Roof Leak Guasti, CA
Rv Slide Out Roof Repair Guasti, CA
Rv Roof Leak Repair Near Me Guasti, CA
Rv Slide Out Roof Repair Guasti, CA
Rubber Roof For Camper Guasti, CA
Motorhome Roof Replacement Guasti, CA
Resealing Rv Roof Guasti, CA
Rv Roof Leak Repair Guasti, CA
Replace Rv Roof Guasti, CA
Best Seo Agencies Guasti, CA
Near Seo Citations Guasti, CA
OCRV Center
Table of Contents
- – Repair Rv Roof Guasti, CA
- – OCRV Center
- – Replace Rv Roof Guasti, CA
- – Rv Rubber Roof Replacement Guasti, CA
- – Rubber Roofing For Campers Guasti, CA
- – Rv Trailer Rubber Roof Repair Guasti, CA
- – Resealing Rv Roof Guasti, CA
- – Rv Rubber Roof Replacement Guasti, CA
- – Rv Slide Out Roof Repair Guasti, CA
- – Resealing Rv Roof Guasti, CA
- – Rv Roof Repair Service Near Me Guasti, CA
- – Rv Roof Repair Guasti, CA
- – Motorhome Roof Replacement Guasti, CA
- – Resealing Rv Roof Guasti, CA
- – Rv Trailer Roof Repair Guasti, CA
- – OCRV Center
Latest Posts
Fleet Service Santa Ana
Truck Service Santa Ana
Truck Repairs Brea
More
Latest Posts
Fleet Service Santa Ana
Truck Service Santa Ana
Truck Repairs Brea